Sunday, September 5, 2010

Saturday, September 4, 2010

Make it yourself Fabric flower


I love this flowers and it's so easy to make them. I decided to show you in pictures how to do it yourself.

1. You need 2 pieces of fabric ( I prefer satin). The measurements can be different, I never cut the same pieces because I like different size. For the blue flower I cut 1 3 x 9 1/2 and 1 2 1/2 x 9 1/2 inches fabric.
2. Sew the right sides together, and after you are done turn each fabric inside out.

3. Now you need a needle and a tread, I got a white color only because it is easier for you to see what am I doing. Make it tight on the beginning and don't make a knot on the end becaus you will need to pull it in order to make the shape that we love.


On this photo you can see how it
looks after you pull the tread. After you do it secure it so it doesn't get loose. Repeat the same with the other fabric.


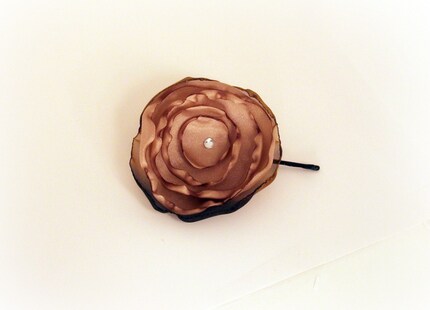
Now we have 2 flowers and they are so different, which is the best part.
4. You can sew them together or use a glue gun, your choice.
5. I prefer to glue something on the bottom because it looks better if you add a bobby pin or else it's easier to glue the element to the fabric and it's not a messy.
Hope you like it and if you have a question let me know.

Tuesday, July 6, 2010

My New Clutch Collection


Recently I decided to to follow my passion for fashion, I love accessories and apparel. I made a couple of clutches that I love and the fabrics are gorgeous. I hope you will fall in love with them too.
I'll continue to experiment with fabrics and I'll keep you posted for my new products.

Wednesday, June 9, 2010

Beautiful Dancer with my handmade flowers


Hello, one of my very good customer and friend Jennifer www.syrendell.etsy.com purchased for her daughter 3 beautiful bobby pin Flowers from my shop. I just want to share with you how pretty her hair looked. You can wear my flower to dance, work,party or anywhere, they will give a beautiful accent to your outfit. Thank you Jenn the picture with us. I love it.

Tuesday, June 8, 2010

Have you tried Zibbet?

Hi all, I haven't posted anything in a while. Yesterday I create an account in Zibbet, I don't know if you heard about this site, you can sell,buy or just hang out. I signed as a seller and it's totally free of charge, if you list an item or sell it's free as well. Also if you would like more features you can upgrade your account to premium which will cost you a $9.99 a month. There are a lot of cool features and forums and everything you need fore promoting your work. Check it here and I hope this will bring you many more sales. http://www.zibbet.com/PearlForU/sell

Wednesday, April 21, 2010

Beautiful accessory


This beautiful accessory will be great touch for your hair. The fabric is very pretty and I have different colors and sizes. I hope you like it as I do. Let me know what do you think?

PearlForU

Monday, November 23, 2009

Merry Mice


Whether used as gift tags or just given as sweet presents all by themselves, these candy Christmas mice are sure to cause a stir.

Materials
  • Red and green felt
  • Scissors
  • Glue
  • Pom-poms
  • Candy canes
  • Googly eyes
  • Tape
X
Instructions
  1. Merry Mice - Step 1 Cut a 6-inch-long teardrop-shaped body from red felt. Near the center, cut 2 parallel slits that are 1 inch long and 1/2 inch apart.

  2. Merry Mice - Step 2 For a pair of ears, cut a 5-inch-long rounded bow-tie shape from green felt. This will be used to make the ears.

  3. To put the mouse together, fit the ears through the slits in the body. Glue on googly eyes and a pom-pom nose.

  4. Finally, add a curly tail by slipping a candy cane beneath the mouse and tucking the straight end between the body and the ears to hold it in place.

Foam Wonderland

This is a great idea I like hope you will too.
No matter how low the mercury falls, it never gets too cold to play in this snowy enchanted forest. Made from thin sheets of foam rubber (ask for Foamies at your local craft or art supply store) or poster board, the pieces are a cinch to assemble and virtually unbreakable, unlike many tabletop figurines.

ROUND UP SOME ANIMALS

Once your child has decided which creatures he'd like to populate his forest, help him sketch the parts of each figure on the foam or poster board. Begin by outlining the animal's torso with only its head and tail attached. Next, draw two pairs of legs (and a set of antlers, if appropriate) separate from the rest of the body. frosty and friendsCut out the individual pieces with scissors and then snip narrow notches in the top of each set of legs and the bottom of the torso, as shown. Fit the pieces together so the animal will stand on its own. Use the same method to attach the antlers. Add eyes (or stripes on a raccoon's or skunk's tail) with colored markers or paints.

BUILD A SNOWMAN

Cut out two matching foam snowmen. Notch one cutout from the head to the middle of its belly and the other from the bottom to the middle of its belly. Fit both pieces together. Now cut out a notched top hat and carrot nose, and attach them to the snowman. For a scarf, cut out a wavy ribbon shape with one curved end. Cut off the curved end about 1 inch from the edge, then notch the cut edge on both pieces of the scarf and fit them onto the snowman's neck. Draw on coal eyes and a mouth.

FIND A CONSTELLATION

To make stars and a moon come out in your forest, start with pairs of matching shapes. Notch one cutout from the center of a point and the matching star from between two points. Then fit the pieces together. (For a moon, use notched circles.) Thread fishing line through the tops and hang them above the scene.

PLANT TREES

It wouldn't be a forest without pines. Again, start with like shapes. Notch one from the top to the center and the other from the bottom to the center. Then fit the two together.

LET IT SNOW

Now your child can set up his forest on a sheet of cardboard covered with drifts of faux snow.

Pearl+For+U

Pearl+For+U

Monday, November 9, 2009

Blue heart earrings

Very pretty and elegant earrings, you can open the heart and place something special.